How to make a medieval tent?
Not so long ago, I wanted to build a medieval tent. Actually, I needed to build a medieval tent.
The first idea was to buy one. Now that I look beck on it, I should have done that.
But at the time I did not have the money to buy one. Medieval tents cost around 1000€ and that's just for the tent part. Shipping is not included in this price.
Thus my adventure to build one beggins.
Step 1. Know what you want!
The tent I wanted is a small medieval tent from the 11th century. This needs 2 poles that will hold it up and 1 pole that will connect those 2 and hold the center up..
I wanted one side to be completely open and to be able to use that side as a parasol.
Step 2. Blueprint!

This is my original drawing. It should be 180 cm high, 200 cm wide and 400 cm long.
Once I had that, I was able to do some math.
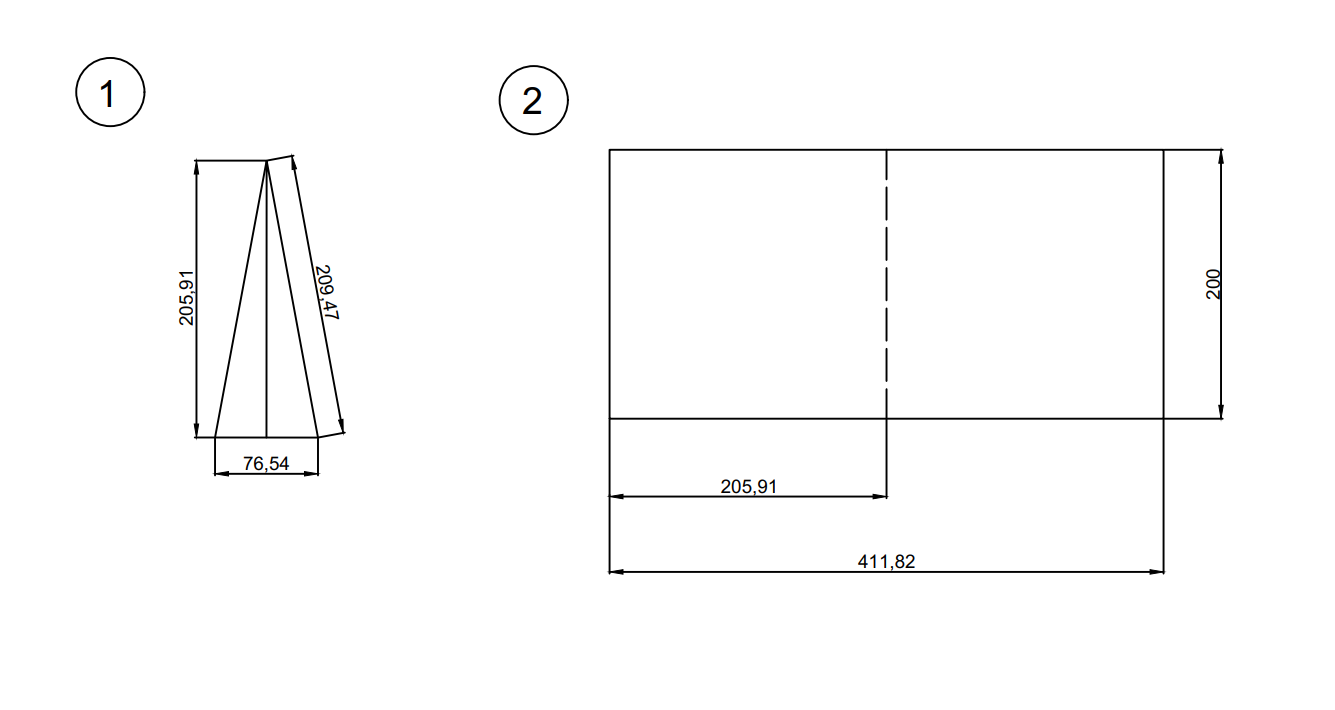
The tent consists of only one rectangle (2) and 8 triangles (1). 4 on each side.
On this sketch (1) and (2) you can see the measurements I used without seam allowance.
Step 3. Get the material and cut!
This is the scary part. I couldn't do a mockup, so I just had to do it.
I used raw canvas as the material. And for the seam allowance, because I didn't make a mockup, I took 3 cm on every seam. Just to be sure.
Step 4. Sewing!
This part wasn't hard, but it did take some time. The first thing I did was put all the triangles together. 4 on one side and 4 on the other. Once that was done, I was done with the long part. Now comes the hard part. The assembly.
It wasn't hard from a sewing or logic standpoint, but from physical standpoint. You have to work with all the weight of the tent.
Once all the pieces were assembled, it was time for trimming and hemming.

Step 5. Holes!
This tent is ment to be streched and nailed to the ground. That's why you need holes. Now you can make the holes however you want. I just sewed some string in loops at each seam and some where I felt like it needed some.

And that's it. A brief description of how I built a medieval tent.
I'll do more blogposts that go into detail, but for now that's all.
I hope this will help someone.


Comments
Post a Comment